3CX Connection #
This connection provides a data collection service for the 3CX communications platform. It provides call data modeling to enable usage of call analytics (Dashboards/Wallboards) on Self-Hosted 3CX installations.
This page outlines how to install the 3CX Remote Collector service on a 3CX PBX
info
For information on how to set up ~.Dimensions.~ on a Passive Failover 3CX system, please see here.
Requirements #
The following requirements must be met in order to deploy ~.Dimensions.~ on a 3CX installation.
- Self-hosted 3CX running 18.0 or later1 on Linux
- Dedicated Administrator user account on the 3CX system
info
Full 3CX release version support information here.
The ~.Dimensions.~ 3CX collector will run on the 3CX host machine to collect data and pass it to the main ~.Dimensions.~ cloud solution for storage and analytics. The collector uses minimal CPU resource but does have an impact on the memory requirements for the 3CX host.
The table below provides a guide to memory usage of the collector.
| Simultaneous Calls | Expected Memory Usage |
|---|---|
| 4 - 32 | ~ 350 MB |
| 48 - 64 | ~ 600 MB |
| 96 - 128 | ~ 750 MB |
| 192 - 256 | ~ 900 MB |
| 512 - 1024 | ~ 1024 MB |
note
Memory requirements are affected by the number of devices, users and call rate. Please be prepared to deploy more memory if required.
Installation #
Step 1 - 3CX User Account Setup #
Please create a 'System Owner' account (with a complex password) for ~.Dimensions.~ on the customer's 3CX instance:
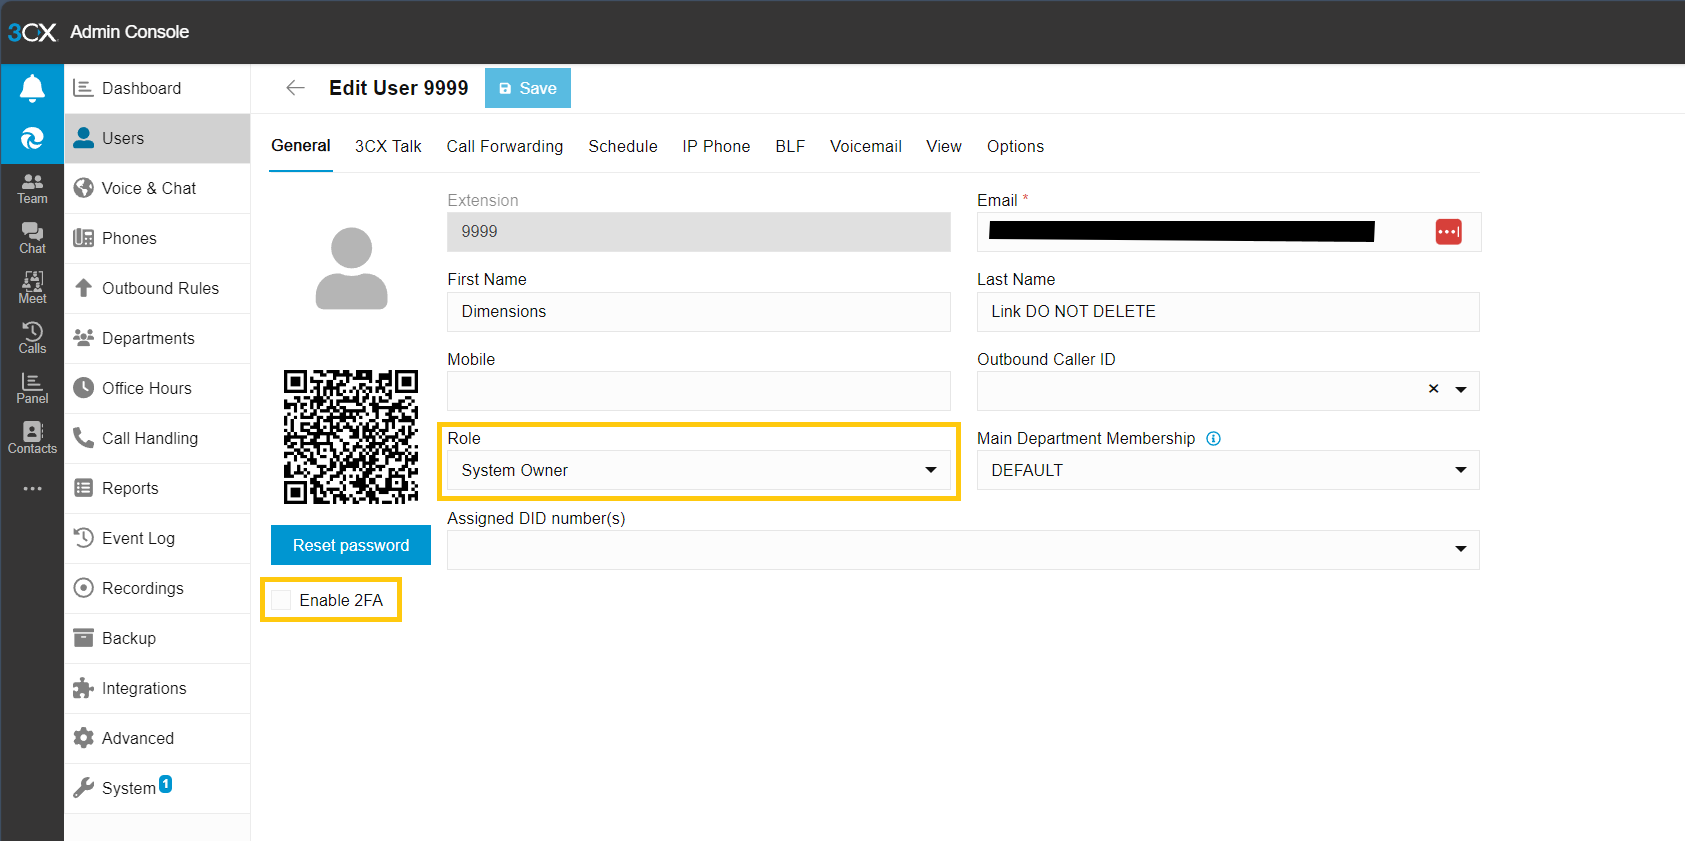
This account is used by the ~.Dimensions.~ Collector software to query configuration and license information from the 3CX that is needed to model call traffic correctly.
tip
Ensure that 'Enable 2FA' is disabled.
tip
The User Credentials for this account will be needed in Step 2.
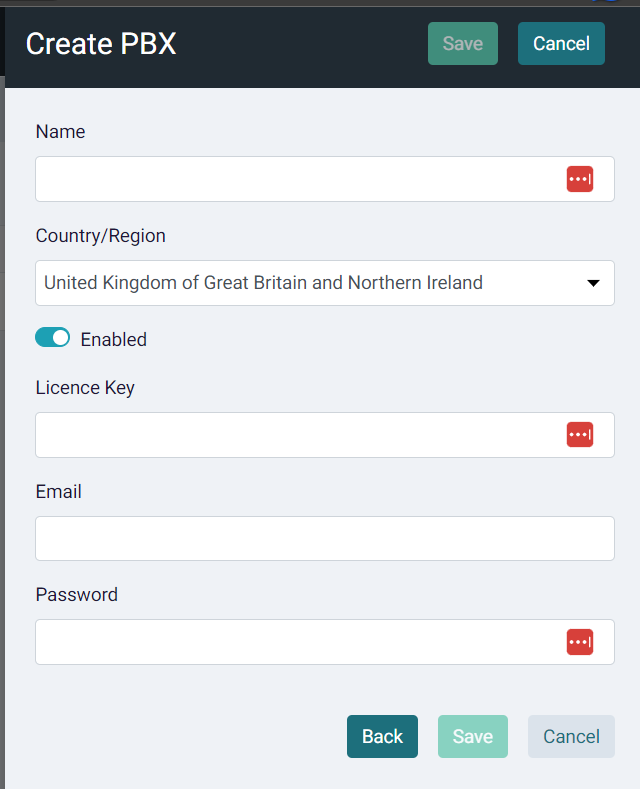
Step 2 - ~.Dimensions.~ Customer Account Creation #
In the ~.Dimensions.~ reseller portal, create a new PBX connection, entering in the 3CX License Key and the username/ext and password from the previous step
Step 3 - ~.Dimensions.~ 3CX Collector Installation #
Now that the ~.Dimensions.~ Customer account has been created, the Dimensions collector can be installed on the customer's 3CX instance. Once it has been installed, it will automatically connect back to the ~.Dimensions.~ Customer account using the license key information and will begin modeling call and user activity.
-
SSH into the 3CX instance.
-
Ensure you are starting in the users home folder
cd $home- Download the installer script from the clients website for that region (na, uk, eu or au)
wget -O install.sh https://clients.{region}.myreports.cloud/3cx/install.shinfo
Replace {region} with na (North America), uk (United Kingdom), eu (European Union) or au (Australia/New Zealand), depending on your region.
warning
The -O flag overwrites any existing script in that folder
- Make the script executable
chmod +x ./install.sh- Run the script providing the version number you want to install e.g.
sudo ./install.sh latestThis should show that the installation path was not found and perform a clean install to /opt/RemoteCollector.ThreeCx/
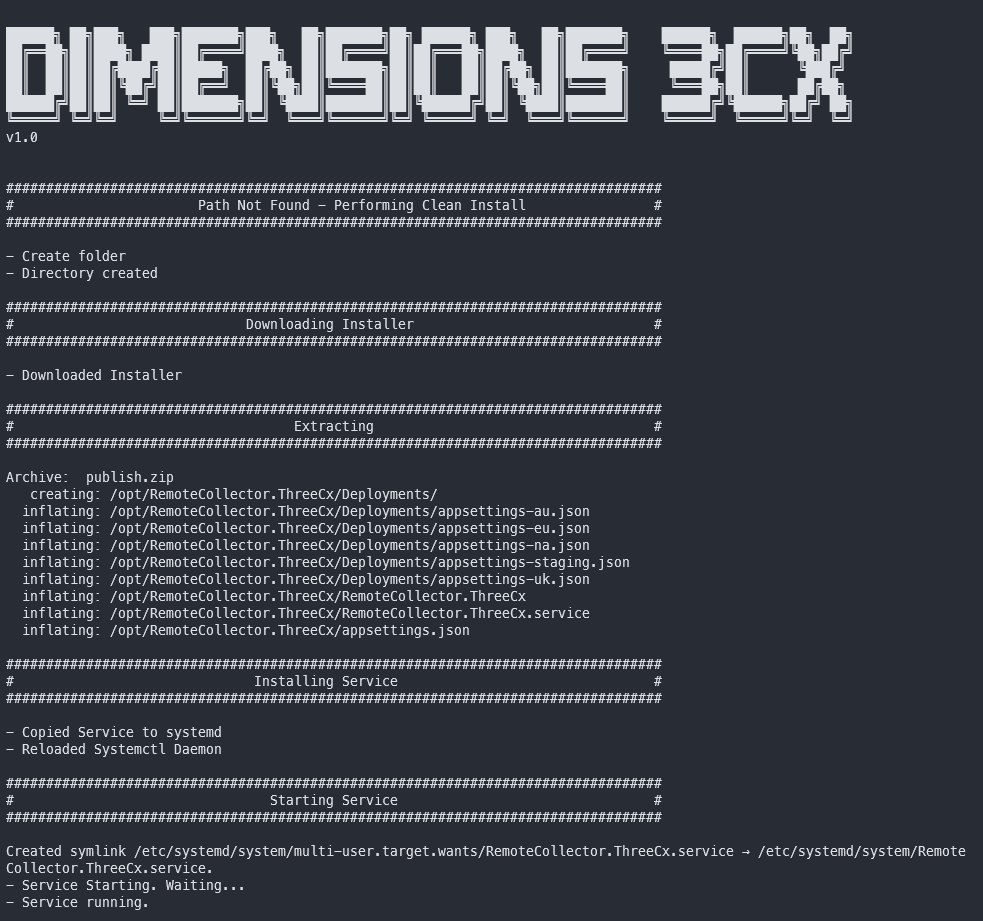
The collector should now be installed and should start passing call and user information back to the server to enable analytics features.
Step 4 - Customizations #
If you are using a non-standard port on your 3CX system, you will need to update a local 'settings.json' file with the correct details in order for the ~.Dimensions.~ 3CX Collector to connect to the 3CX system successfully.
Modify the following file:
/opt/RemoteCollector.ThreeCx/settings.jsonChange the following two parameters:
 "AutoDetectHost": false,
"ThreeHostPort": {CUSTOMVALUE}info
The 'settings.json' file is created by the collector after it is installed.
An example of the full 'settings.json' file:
{
  "PersistedSettings": {
    "TenantId": "",
    "LicenseKey": "",
    "InstrumentationConnectionString": "",
    "EnableAutoUpdate": true,
    "AutoUpdateTime": "02:00:00",
    "AutoDetectHost": false,
    "ThreeHostProtocol": "https",
    "ThreeHost": "127.0.0.1",
    "ThreeHostDisableSslValidation": true,
    "ThreeHostPort": 1234
}
Upgrade #
Automatically #
Manually #
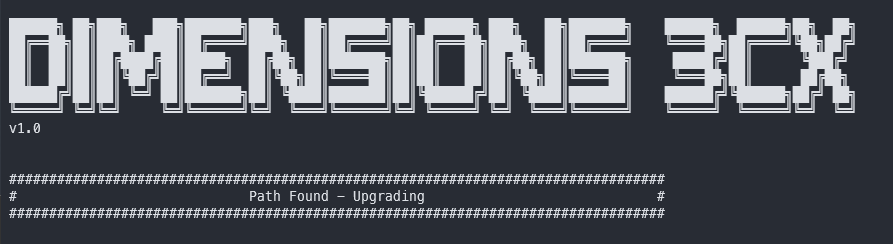
Run the script with the new version number and it will automatically upgrade the software:
sudo ./install.sh 1.87.2The message should show that an installation was found and that it is upgrading
Uninstall #
Run the script with remove as the parameter
sudo ./install.sh removeThis will prompt if you want to remove the connector
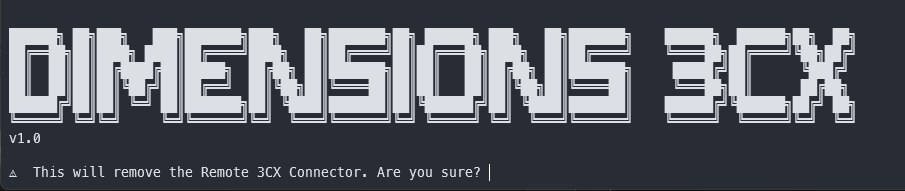
Press Y to continue, this will remove the service, all files and logs.
Installing a Specific Version #
If instructed by support, you may need to install a specific release of the collector (to support an older 3CX version or test a patch for example).
To install a specific version, enter the specific version rather than latest:
sudo ./install.sh 1.87.1warning
Only do this if instructed to by support.
Controlling the service #
Stop the service
systemctl stop RemoteCollector.ThreeCx.serviceStart the service
systemctl start RemoteCollector.ThreeCx.serviceGet the state of the service
systemctl status RemoteCollector.ThreeCx.serviceSee service logs
View logs
journalctl -xeu RemoteCollector.ThreeCx.serviceFollow logs live:
journalctl -xefu RemoteCollector.ThreeCx.serviceLogs #
By default logs are installed to
/opt/RemoteCollector.ThreeCx/logsThese are zipped into an archive folder on a daily basis.

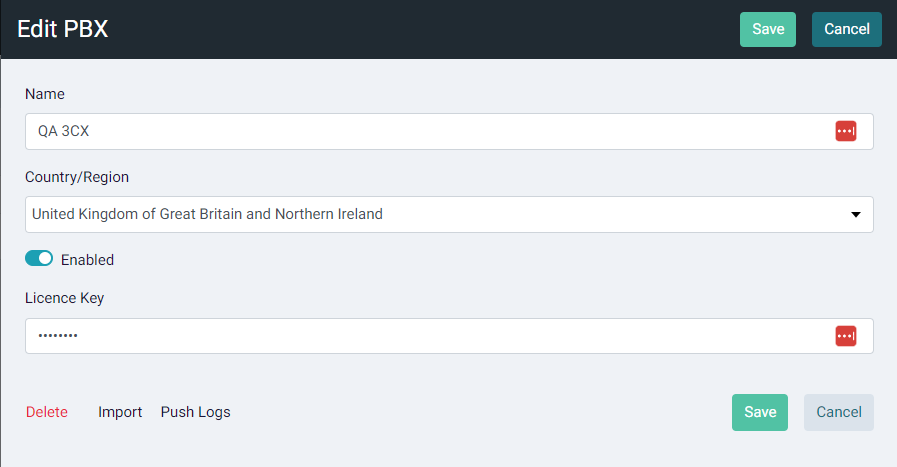
Logs can be retrieved from the client by using the push logs button in the Edit PBX screen on the reseller portal:
View Installed 3CX Version #
To view the installed version of 3CX when connected via SSH:
apt-cache policy 3cxpbxThis will return the version installed, and the latest version available.
